Cygwin vs MinGW
16 Jul 2017 | C++11 컴파일러개인용 노트 PC에 C++ 개발 환경을 설정하기 위해서 Cygwin과 MinGW을 각각 설치해보면서 어떤 것이 더 좋을 지 테스트를 해보았습니다. 사실 Windows 환경에서는 Visual Studio 하나면 C++ 개발 환경은 거의 끝이지만, 최대한 Linux 환경과 비슷하게 만들기 위해서 MinGW와 Cygwin을 살펴보았습니다.
Cygwin vs MinGW
Cygwin과 MinGW는 둘 다 태생은 비슷합니다. Cygwin은 Windows에서 Linux 환경을 에뮬레이팅하기 위하여 Windows로 포팅된 UNIX 기반 소프트웨어입니다. 그리고, MinGW은 Cygwin 1.3.3 버전에서 분리되어져서 나왔습니다.
그 이후 Cygwin과 MinGW은 완전히 다른 노선을 걷기 시작합니다. Cygwin은 Windows 위에서 작동하는 Linux 호환 Layer를 구성하고 그 위에서 추가 에뮬레이션되어 동작하도록 구현되었습니다. 하지만 MinGW는 네이티브(Native) Windows 타켓으로 동작하도록 구현되었습니다. 그러다보니 아무래도 MinGW가 Cygwin보다 성능면에서 더 빠르게 동작하는 경우가 많습니다. 대신 Linux 호환성 면에서는 Cygwin이 MigGW보다 더 안정적으로 작동합니다.
MinGW의 목표는 Windows에서 GNU 툴을 사용하기 위한 최소한의 환경 설정 제공에 있습니다. 그래서 이름도 MinGW(Minimalist GNU for Windows)입니다.
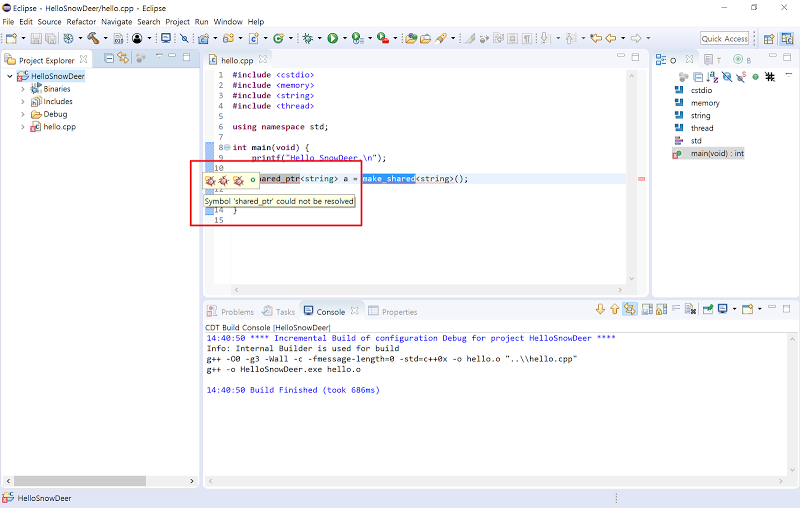
MinGW의 C++11 thread 지원 문제
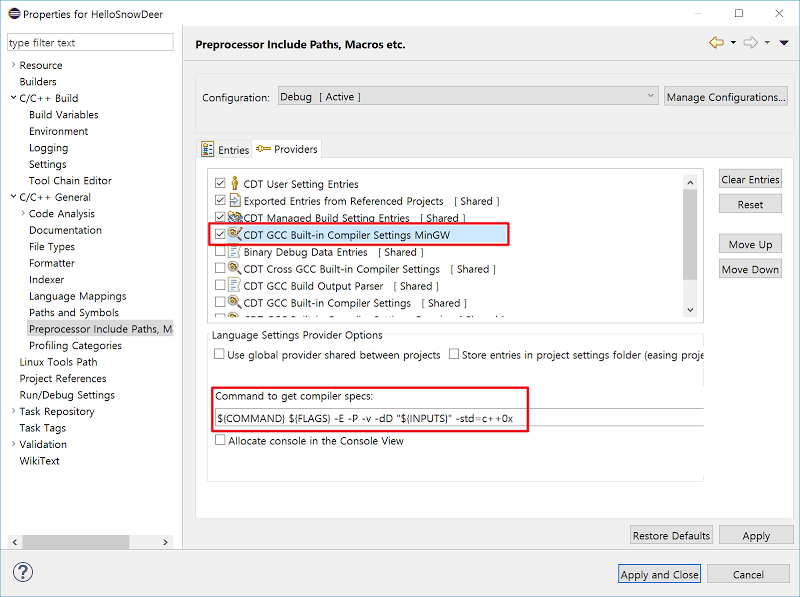
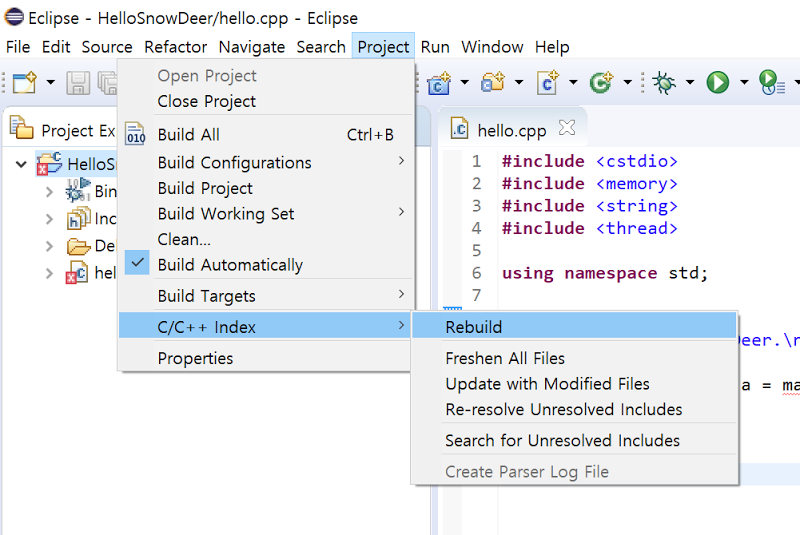
MinGW에서 C++11의 thread를 정식으로 지원하지 않는 문제점이 있습니다. 덕분에 MinGW에서 Thread 관련 요소를 사용하려고 하면(특히 Mutex) 컴파일조차 되지 않고 에러가 발생합니다. 구글링을 통해서 알아보니 mingw-std-threads와 같은 라이브러리를 이용하면 해결할 수 있다고 하네요. 헤더 파일만 적당히 교체하면 되는 라이브러리라 큰 불편 없이 사용할 수 있을 것 같지만, 그래도 편법으로 해결하는거라 개운하지는 않네요. 그래서 저는 Cygwin을 추가로 설치했습니다. Cygwin에서는 이런 문제가 전혀 발생하지 않습니다.
MSYS
MSYS는 MinGW에서 bash나 make 등의 명령어를 수행할 수 있게 해주는 커맨드 쉘(Command Shell)입니다. Cygwin의 경우는 UNIX 대부분의 환경을 에뮬레이팅해주고 있지만, MSYS는 개발에 필요한 최소한의 요소들만 지원을 해주고 있습니다.
MSYS는 Cygwin의 초기 버전에서 분리되어 개발되었으며, 최근에는 Cygwin 최신 버전 기반으로 한 MSYS2도 있습니다. Cygwin이나 MSYS나 간단히 개발용으로 사용하기에는 큰 차이 없는 것 같습니다.
설치 용량 차이
대부분 하드디스크의 용량은 넉넉하다보니 설치 용량 차이가 큰 의미는 없을 수 있는데, 그래도 살짝 언급해봅니다. C++ 개발을 위한 MinGW의 설치 용량은 350MB 수준입니다. Cygwin의 경우는 약 10GB 수준입니다. 이것도 Cygwin 항목중에 development 항목만 추가했을 때의 용량입니다. 제가 C++ 개발을 위한 최소한의 옵션만으로 설정하지는 않았지만 그래도 아주 큰 차이가 있네요. 덕분에 설치 시간도 엄청나게 차이가 납니다. 물론, 설치는 처음 한 번만 하면 되니깐 아주 큰 문제는 아닐 수 있겠네요.
결국 C++11 thread 지원 문제 때문에 저는 MinGW를 설치했다가 지금은 완전히 지우고 Cygwin으로 넘어갔습니다.