간단한 Web Framework 구현하기 (4) - Context
13 Mar 2018 | GoContext
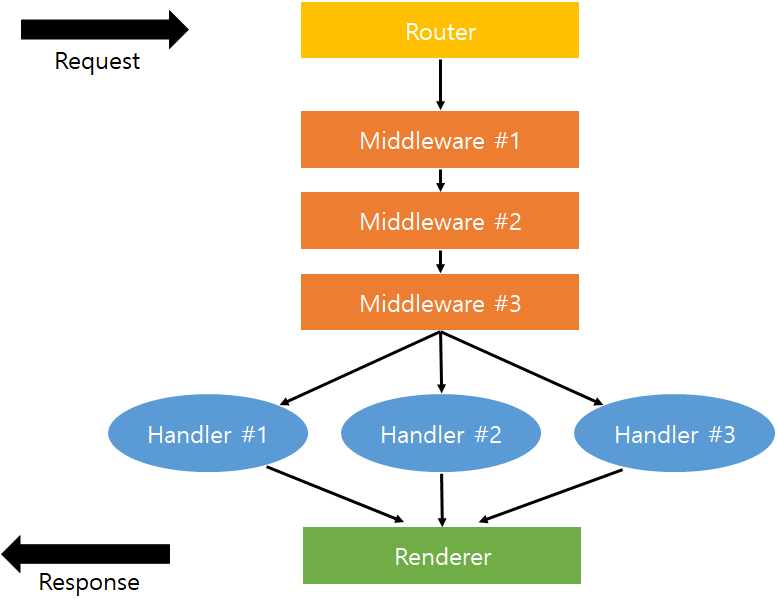
Context는 사용자로부터 URL 패턴을 받았을 때, 해당 매개변수 및 Request, Repose 등을 저장할 수 있는 구조체입니다.
여기서는 다음과 같이 정의했습니다.
context.go
package main

import "net/http"

type Context struct {
	Params map[string]interface{}

	ResponseWriter http.ResponseWriter
	Request        *http.Request
}

type HandlerFunc func(*Context)
router.go
위에서 만든 Context 구조체를 이용해서 기존의 http.ResponseWriter와 http.Request를 저장할 수 있습니다. 또한 이 구조체를 매개변수로 하는 HandlerFunc라는 인터페이스를 정의했기 때문에 기존의 http.HandlerFunc() 함수 호출 부분을 수정해줍니다.
package main

import (
	"net/http"
	"strings"
)

type router struct {
	handlers map[string]map[string]HandlerFunc
}

func (r *router) HandleFunc(method, pattern string, h HandlerFunc) {
	m, ok := r.handlers[method]

	if !ok {
		m = make(map[string]HandlerFunc)
		r.handlers[method] = m
	}
	m[pattern] = h
}

func (r *router) ServeHTTP(w http.ResponseWriter, req *http.Request) {
	for pattern, handler := range r.handlers[req.Method] {
		if ok, params := match(pattern, req.URL.Path); ok {
			// Create Context

			c := Context{
				Params:         make(map[string]interface{}),
				ResponseWriter: w,
				Request:        req,
			}

			for k, v := range params {
				c.Params[k] = v
			}

			handler(&c)
			return
		}
	}

	http.NotFound(w, req)
}

func match(pattern, path string) (bool, map[string]string) {
	if pattern == path {
		return true, nil
	}

	patterns := strings.Split(pattern, "/")
	paths := strings.Split(path, "/")

	if len(patterns) != len(paths) {
		return false, nil
	}

	params := make(map[string]string)

	for i := 0; i < len(patterns); i++ {
		switch {
		case patterns[i] == paths[i]:
		case len(patterns[i]) > 0 && patterns[i][0] == ':':
			params[patterns[i][1:]] = paths[i]
		default:
			return false, nil
		}
	}

	return true, params
}
main.go
package main

import (
	"fmt"
	"net/http"
)

func main() {
	fmt.Println("Simple Web Framework")

	r := &router{make(map[string]map[string]HandlerFunc)}

	r.HandleFunc("GET", "/", func(c *Context) {
		fmt.Fprintln(c.ResponseWriter, "This is an index page.")
	})

	r.HandleFunc("GET", "/about", func(c *Context) {
		fmt.Fprintln(c.ResponseWriter, "This is an about page.")
	})

	r.HandleFunc("GET", "/users/:id", func(c *Context) {
		fmt.Fprintln(c.ResponseWriter, "Retrieve user: ", c.Params["id"])
	})

	r.HandleFunc("POST", "/users", func(c *Context) {
		fmt.Fprintln(c.ResponseWriter, "Create user")
	})

	http.ListenAndServe(":8080", r)
}