Circle Layout 예제
31 Mar 2018 | AndroidOpen Source를 이용한 Circle Layout
ArcLayout
ArcLayout은 여기에 공유되어 있습니다.
사용법은 간단합니다. 먼저 gradle에 다음과 같이 세팅합니다.
gradle 세팅
dependencies {
    ...
    implementation 'com.ogaclejapan.arclayout:library:1.1.0@aar'
}
사용법
XML에 레이아웃 설정만해도 사용할 수 있기 때문에 간단합니다.
<com.ogaclejapan.arclayout.ArcLayout
    android:layout_width="match_parent"
    android:layout_height="match_parent"
    app:arc_axisRadius="120dp"
    app:arc_color="#4DFFFFFF"
    app:arc_freeAngle="false"
    app:arc_origin="center"
    app:arc_radius="140dp"
    app:arc_reverseAngle="false">

    <Button
        android:layout_width="48dp"
        android:layout_height="48dp"
        android:background="#f44336"
        android:gravity="center"
        android:text="A"
        android:textColor="#FFFFFF"
        app:arc_origin="center"/>

    <Button
        android:layout_width="48dp"
        android:layout_height="48dp"
        android:background="#9c27b0"
        android:gravity="center"
        android:text="B"
        android:textColor="#FFFFFF"
        app:arc_origin="center"/>

    <Button
        android:layout_width="48dp"
        android:layout_height="48dp"
        android:background="#3f51b5"
        android:gravity="center"
        android:text="C"
        android:textColor="#FFFFFF"
        app:arc_origin="center"/>

    <Button
        android:layout_width="48dp"
        android:layout_height="48dp"
        android:background="#4caf50"
        android:gravity="center"
        android:text="D"
        android:textColor="#FFFFFF"
        app:arc_origin="center"/>

    <Button
        android:layout_width="48dp"
        android:layout_height="48dp"
        android:background="#ff5722"
        android:gravity="center"
        android:text="E"
        android:textColor="#FFFFFF"
        app:arc_origin="center"/>

    </com.ogaclejapan.arclayout.ArcLayout>
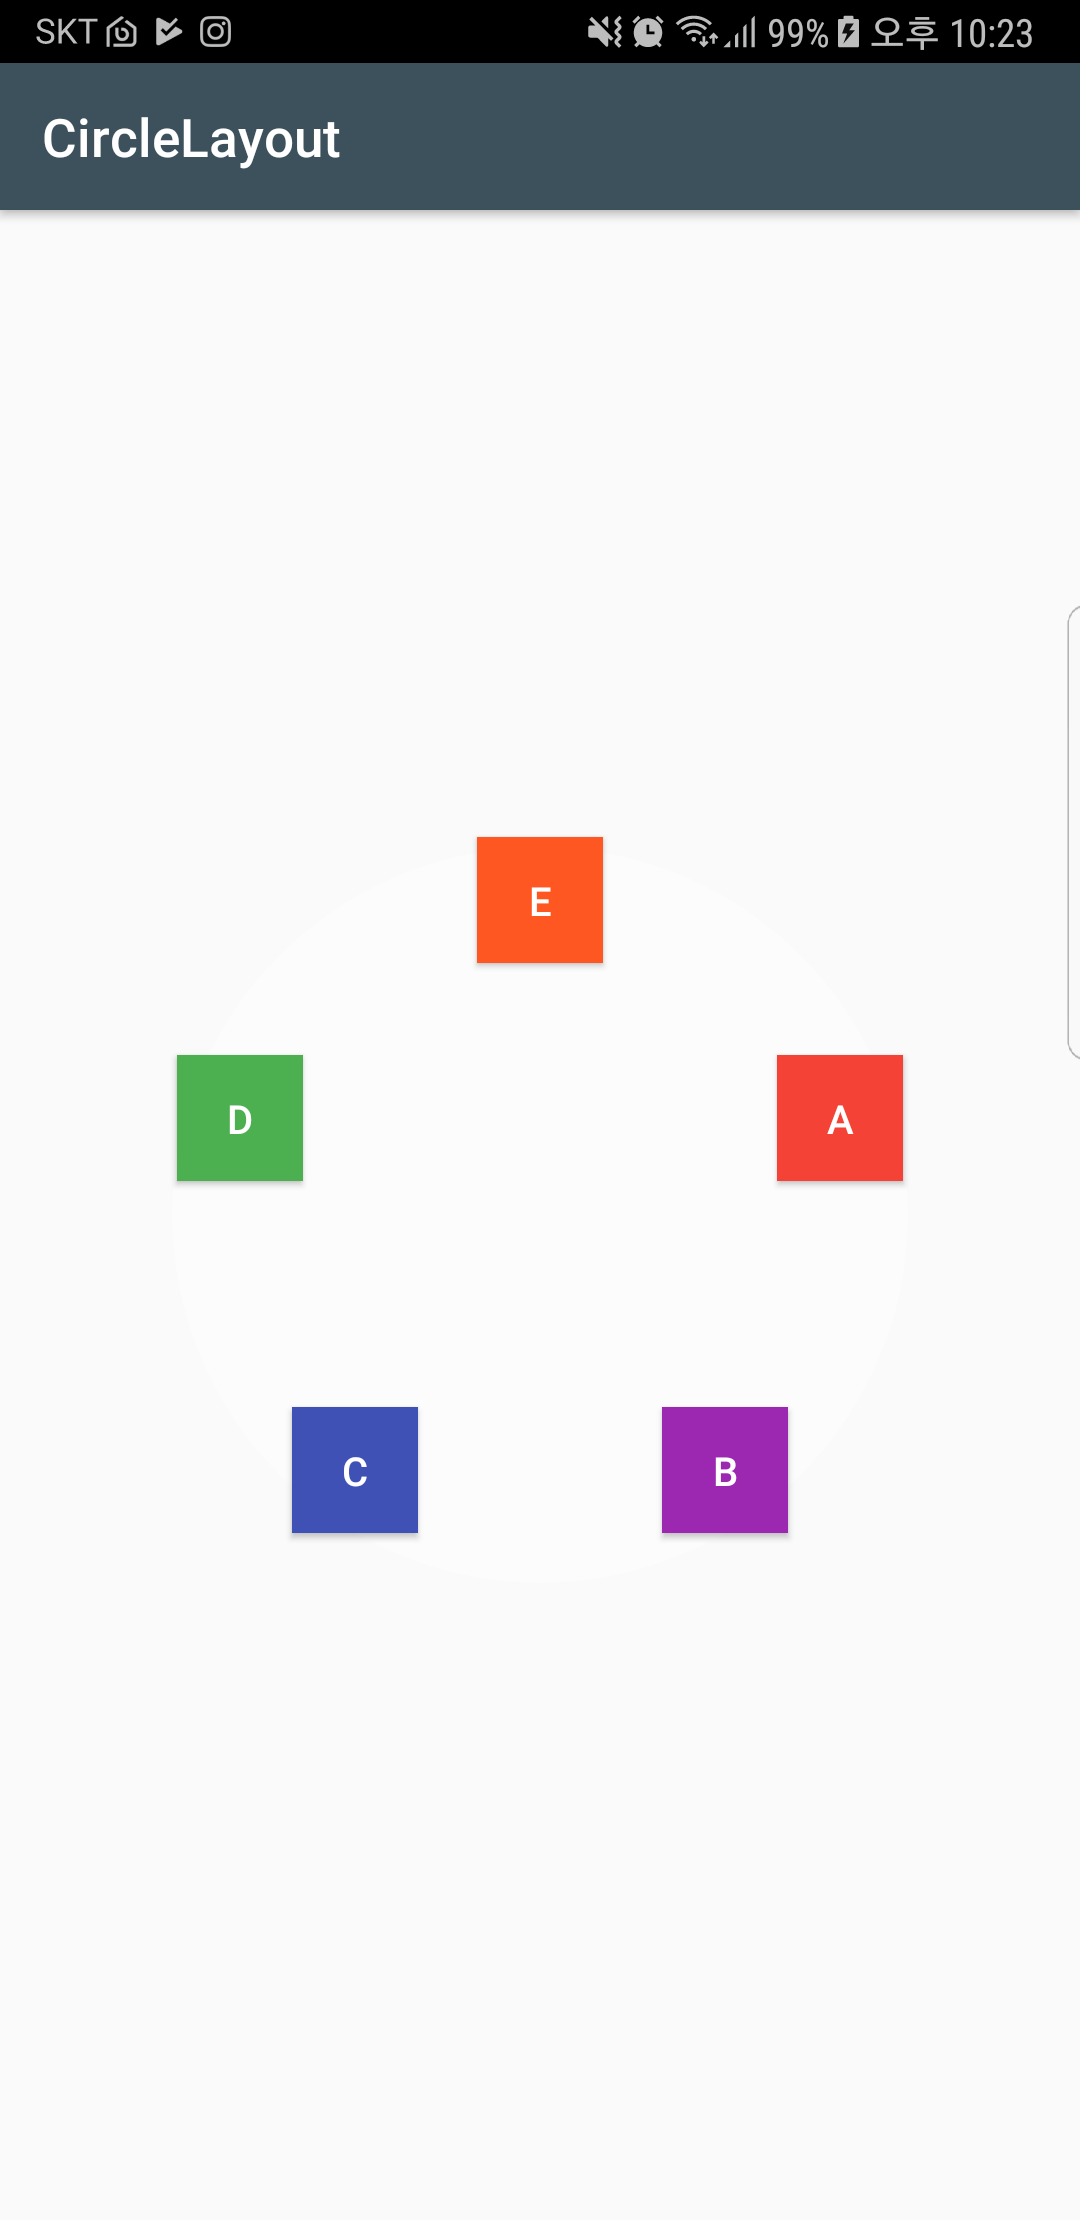
레이아웃의 속성을 변경해서 다음과 같이 Arc 형태로 컴포넌트를 배치할 수도 있습니다.
Circular-Layout
Circular Layout은 여기에 공유되어 있습니다. 좋아요 개수랑 Fork 수는 얼마되지 않지만, 역시나 사용하기 편리한 오픈소스입니다. 사용법은 다음과 같습니다.
gradle 세팅
dependencies {
    ...
    implementation 'com.github.andreilisun:circular-layout:1.0'
}
사용법
XML에 레이아웃 설정만해도 사용할 수 있기 때문에 간단합니다.
<com.github.andreilisun.circular_layout.CircularLayout
  android:layout_width="220dp"
  android:layout_height="220dp">

  <android.support.v7.widget.SwitchCompat
    android:layout_width="wrap_content"
    android:layout_height="wrap_content" />

  <ImageView
    android:layout_width="30dp"
    android:layout_height="30dp"
    android:src="@mipmap/ic_launcher" />

  <Button
    android:layout_width="wrap_content"
    android:layout_height="wrap_content"
    android:text="ok" />

  <CheckBox
    android:layout_width="wrap_content"
    android:layout_height="wrap_content" />

  <RadioButton
    android:layout_width="wrap_content"
    android:layout_height="wrap_content" />

  <Chronometer
    android:layout_width="wrap_content"
    android:layout_height="wrap_content" />

</com.github.andreilisun.circular_layout.CircularLayout>
또한 다음과 같은 형태로 Java 코드내에서 프로그래밍적으로 사용을 할 수도 있습니다.
public class MainActivity extends AppCompatActivity {

    @Override
    protected void onCreate(Bundle savedInstanceState) {
        super.onCreate(savedInstanceState);
        setContentView(R.layout.activity_main);
        final CircularLayout circularLayout = findViewById(R.id.circular_layout);
        int expectedViewsQuantity = 12;
        circularLayout.setCapacity(expectedViewsQuantity);
        for (int i = 0; i < expectedViewsQuantity; i++) {
            TextView textView = (TextView)
                    LayoutInflater.from(this).inflate(R.layout.number_text_view, null);
            textView.setText(String.valueOf(i));
            circularLayout.addView(textView);
        }
    }
}
Circle Layout
Circle Layout은 여기에서 확인할 수 있습니다. 위에서 다룬 Circular Layout보다 좋아요 개수랑 Fork 횟수가 더 많습니다. 사용성은 동일합니다.
gradle 세팅
dependencies {
    ...
    implementation 'io.github.francoiscampbell:circlelayout:0.3.0'
}
사용법
<io.github.francoiscampbell.circlelayout.CircleLayout
  android:layout_width="match_parent"
  android:layout_height="match_parent"
  cl:cl_angleOffset="90"
  cl:cl_centerView="@+id/centerView"
  cl:cl_direction="clockwise"&rt;

  <Switch
    android:id="@+id/centerView"
    android:layout_width="wrap_content"
    android:layout_height="wrap_content"/&rt;

  <TextView
    android:layout_width="wrap_content"
    android:layout_height="wrap_content"
    android:text="12"
    android:textColor="@color/testTextColor"
    android:textSize="@dimen/clockTestSize"/&rt;

  <Button
    android:layout_width="wrap_content"
    android:layout_height="wrap_content"
    android:text="Button"/&rt;

  <CheckBox
    android:layout_width="wrap_content"
    android:layout_height="wrap_content"/&rt;

  <SeekBar
    android:layout_width="wrap_content"
    android:layout_height="wrap_content"/&rt;

</io.github.francoiscampbell.circlelayout.CircleLayout&rt;
위의 오픈 소스들을 사용하면 손쉽게 원형 레이아웃을 구현할 수 있습니다. 하지만, 최근에 구글에서 ConstraintLayout에도 원형 레이아웃 기능을 집어넣어서 개인적으로는 ConstraintLayout을 활용하는 것이 좀 더 낫지 않나 생각이 듭니다.