M1 MacBook 초기 세팅 (개발용 세팅)
M1 맥북의 초기 설정입니다. 아무래도 기존 Intel Mac OS 때와 차이가 있을 수 있어서 하나씩 다시 점검하면서 설정을 했습니다.
M1 Pro 14인치 기준입니다.
업데이트
설치된 S/W들을 최신으로 업데이트합니다.
softwareupdate --all --install --force
시스템 설정
언어 설정
개발용으로 사용하기 때문에 영어가 더 편리할 수 있습니다. Language & Region에서 선호 언어를 영어로 설정합니다.
아래부터는 영문 버전 메뉴 이름을 사용하겠습니다.
- Dock 아이콘 크기는 조금 작게 설정
Magnification을 체크하고 크기는 중상 정도로 설정Show recent applications in Dock 체크 해제Menu Bar의 Automatically hide and show the menubar ...는 둘 다 On
Keyboard 설정
Keyboard 탭
- Key Repeat는
Fast로 설정
- Delay Until Repeat는
Short에서 1칸 왼쪽으로 설정
- Press fn(지구본) to
Do Nothing으로 설정
Text 탭
Correct spelling automatically 항목 OffCapitalize words automatically 항목 OffAdd period with double-space 항목 OffUse smart quotes and dashes 항목 Off
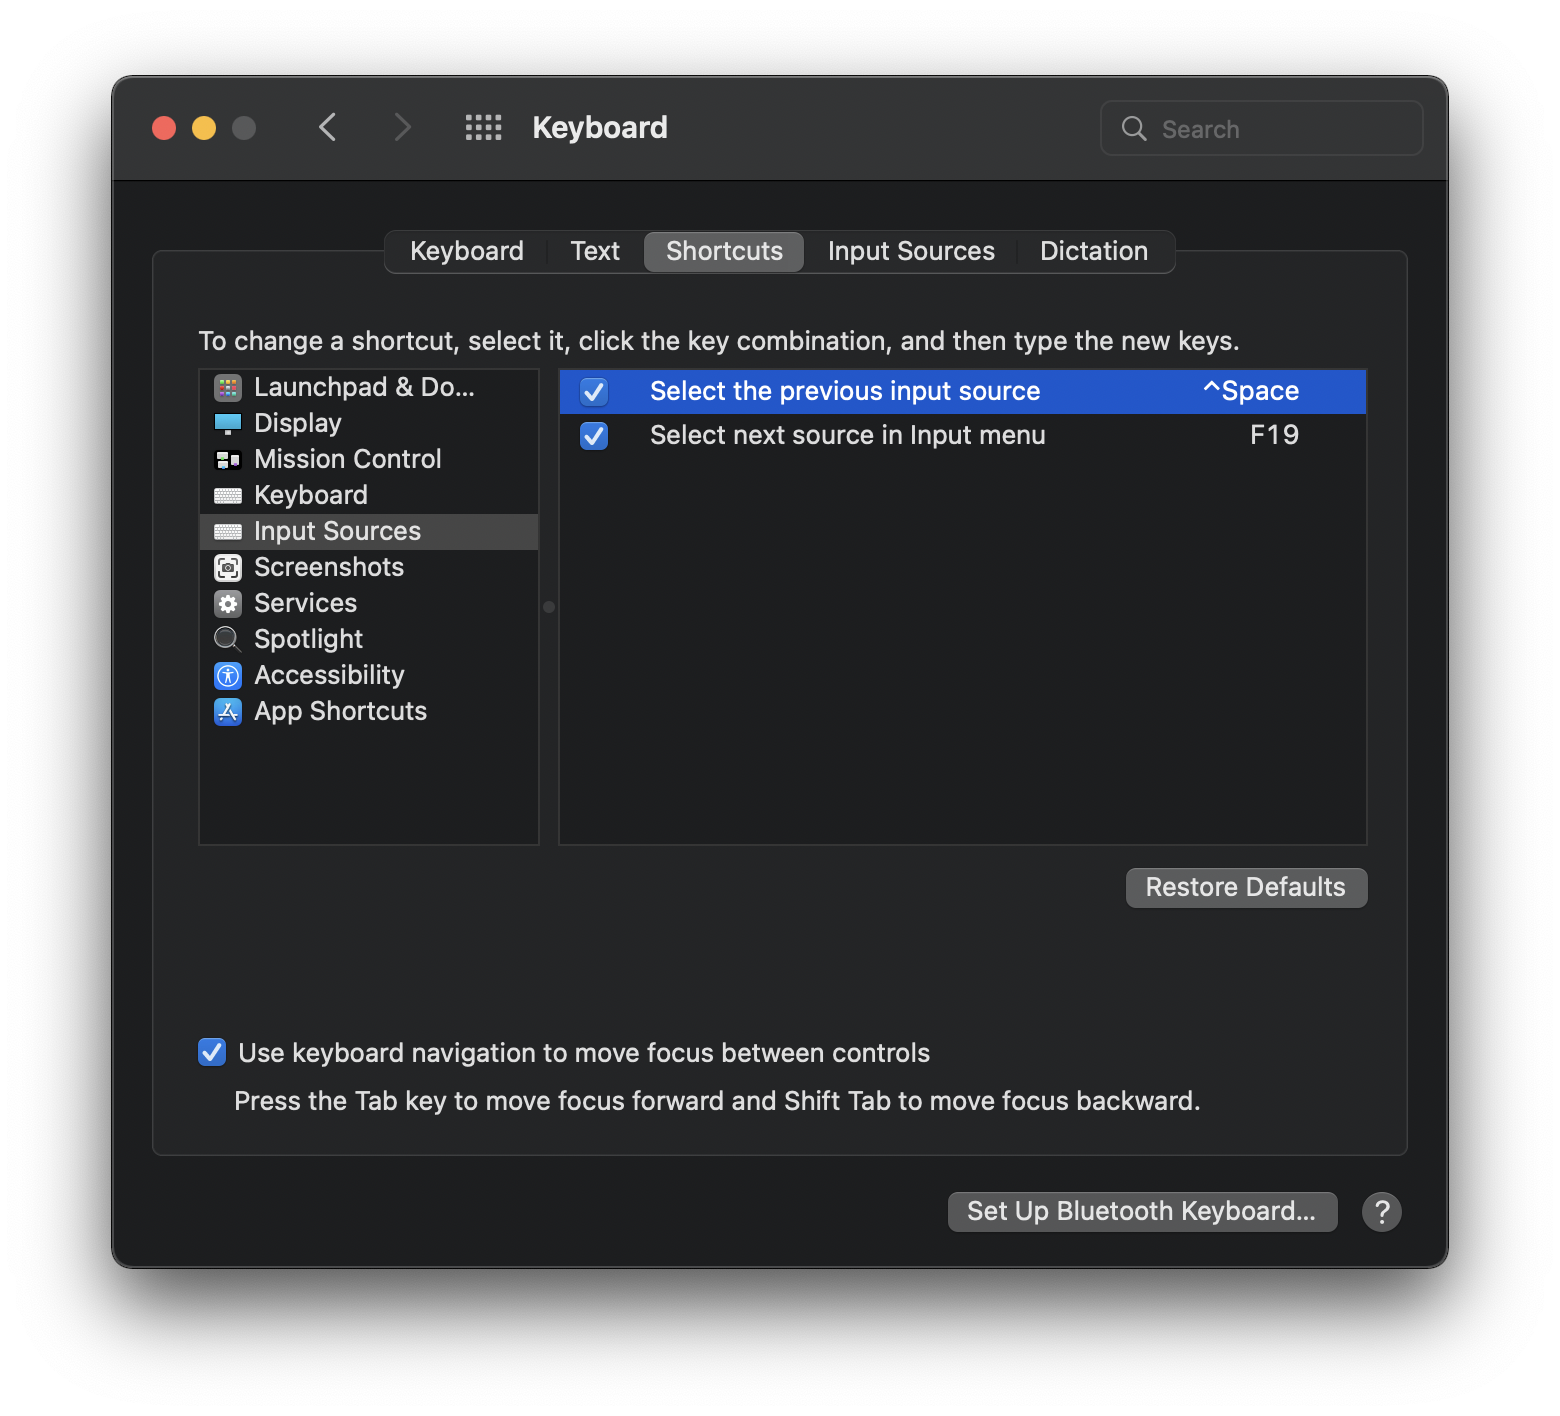
Shortcuts 탭
Spotlight의 Show Finder search window를 Option + E로 변경(윈도우와 비슷하게 하기 위해)Show Spotlight search는 F12로 변경
Display 설정
14인치 맥북 기준으로 아무 설정도 건드리지 않았습니다.
예전 15인치 맥북에서는 Resolution을 최고로 조정했었는데, 이번 14인치 맥북에서는 최고 해상도가 글씨가 조금 작은 듯 하여
기본으로 설정했습니다.
Touch ID 설정
터치 ID는 3개까지 등록 가능한데, 저는 오른 손 검지로 2번, 중지로 1번 등록했습니다.
Finder 설정
Preference 메뉴로 가서
- General 탭에서
New Finder windows show: 항목을 Home folder로 설정(저는 Home이 snowdeer로 되어 있네요.)
- Advance 탭의
Show all filename extensions 항목을 On
- Sidebar 탭에서 필요한 항목들만 보이도록 설정
- 실제 Finder를 실행해서 Sidebar의 순서를 변경
D2Coding 폰트 설치
향후 Oh-my-zsh 설정에서 아마 폰트가 깨질겁니다. Powerline 폰트나 D2Coding 폰트를 설치하면 해결됩니다.
그래서 미리 D2Coding 폰트를 설치해놓도록 하겠습니다.
다운로드: https://github.com/naver/d2codingfont
iTerm2 설치
주로 작업을 터미널에서 하기 때문에 iTerm2를 설치하도록 합니다.
다운로드: https://iterm2.com
그리고 Preferences를 실행해서 다음 항목을 설정합니다.
Profiles > Text > Font를 기본 Monaco에서 D2 Coding으로 변경Profiles > Colors > Color Presets를 Pastel (Dark Backgrond) 또는 Tango Dark로 변경Window > Columns를 80에서 120로 Rows를 30으로 변경(14인치 맥북 기준입니다.)
Visual Studio Code 설치
다운로드: https://code.visualstudio.com/#
그리고 실행한다음 Command + Shift + P를 입력해서 Command Palette를 실행한 다음
shell이라고 입력하면, Shell Command: Install 'code' in PATH를 선택합니다. 그러면 이제 터미널에서 code 명령어를 이용해서
vscode를 실행할 수 있습니다.
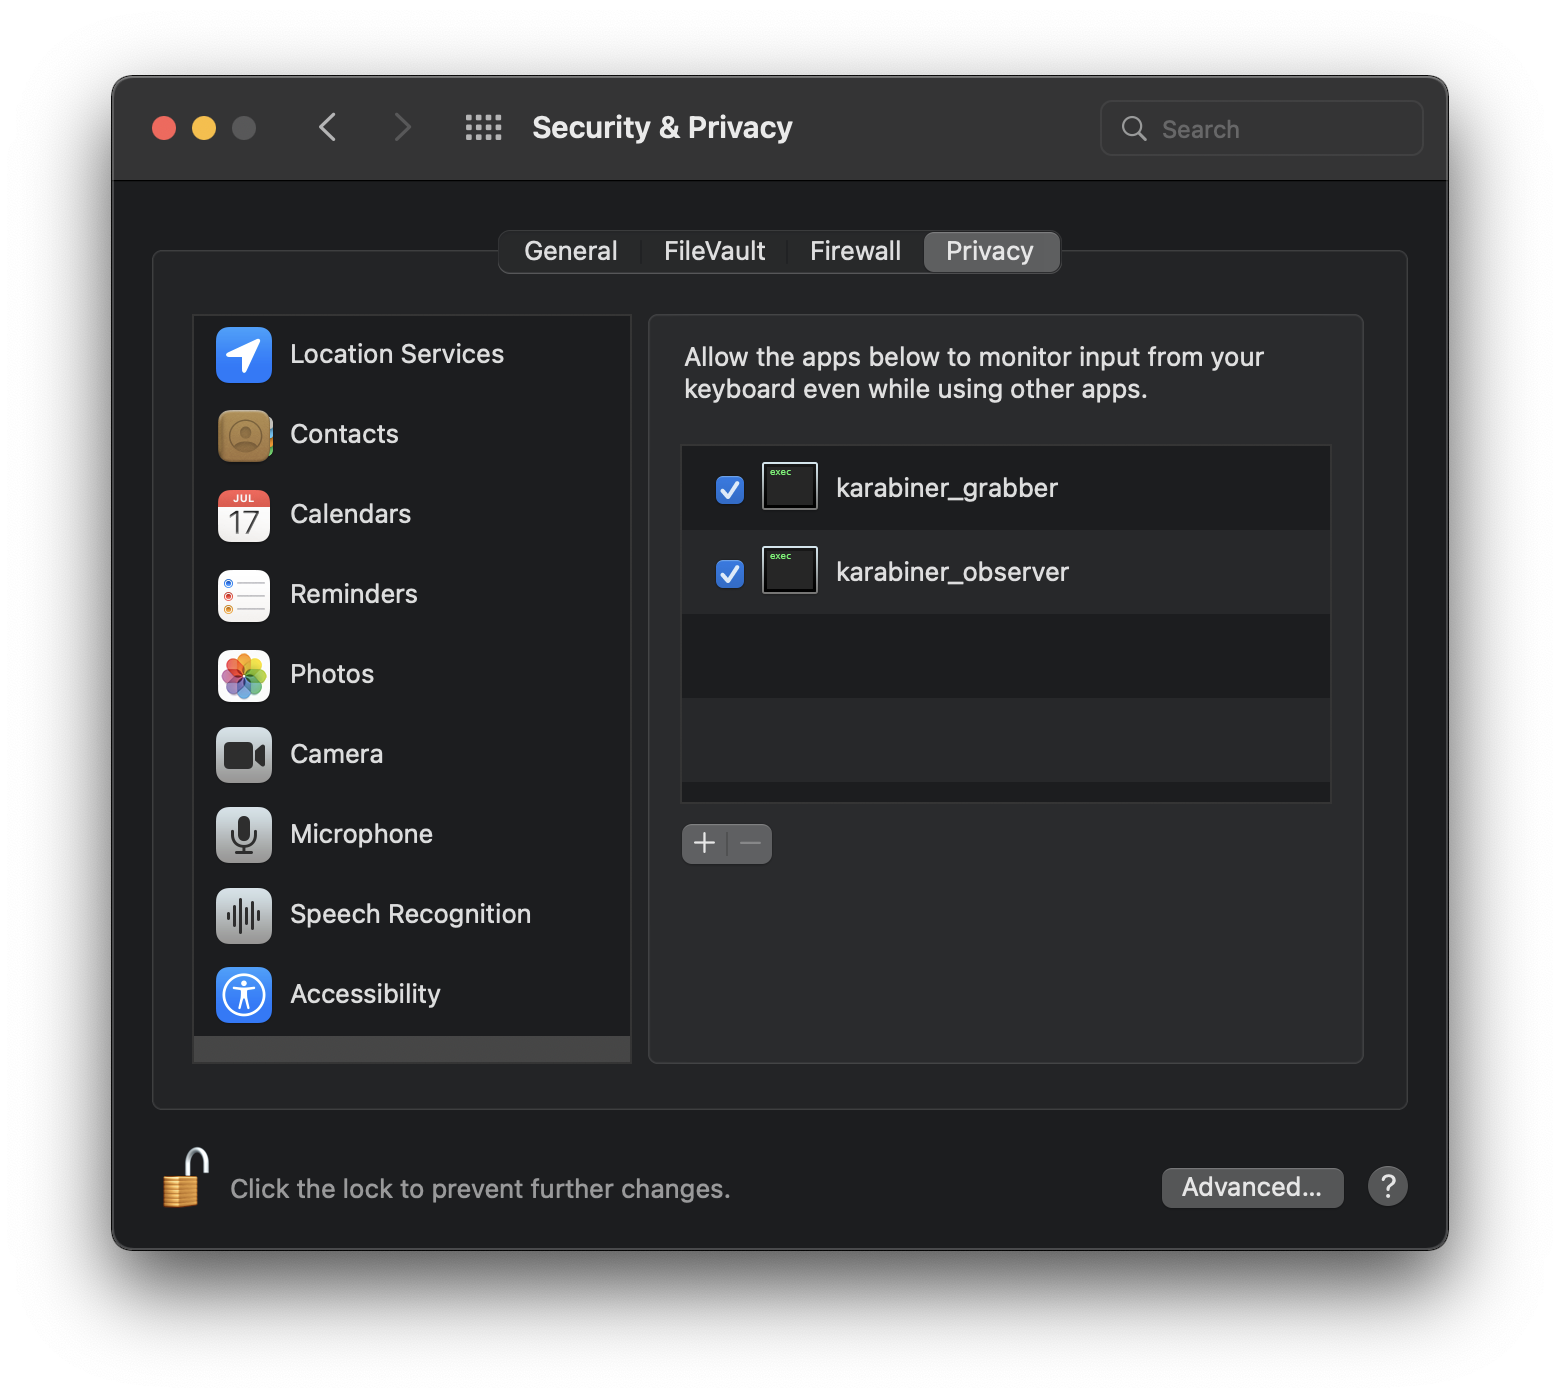
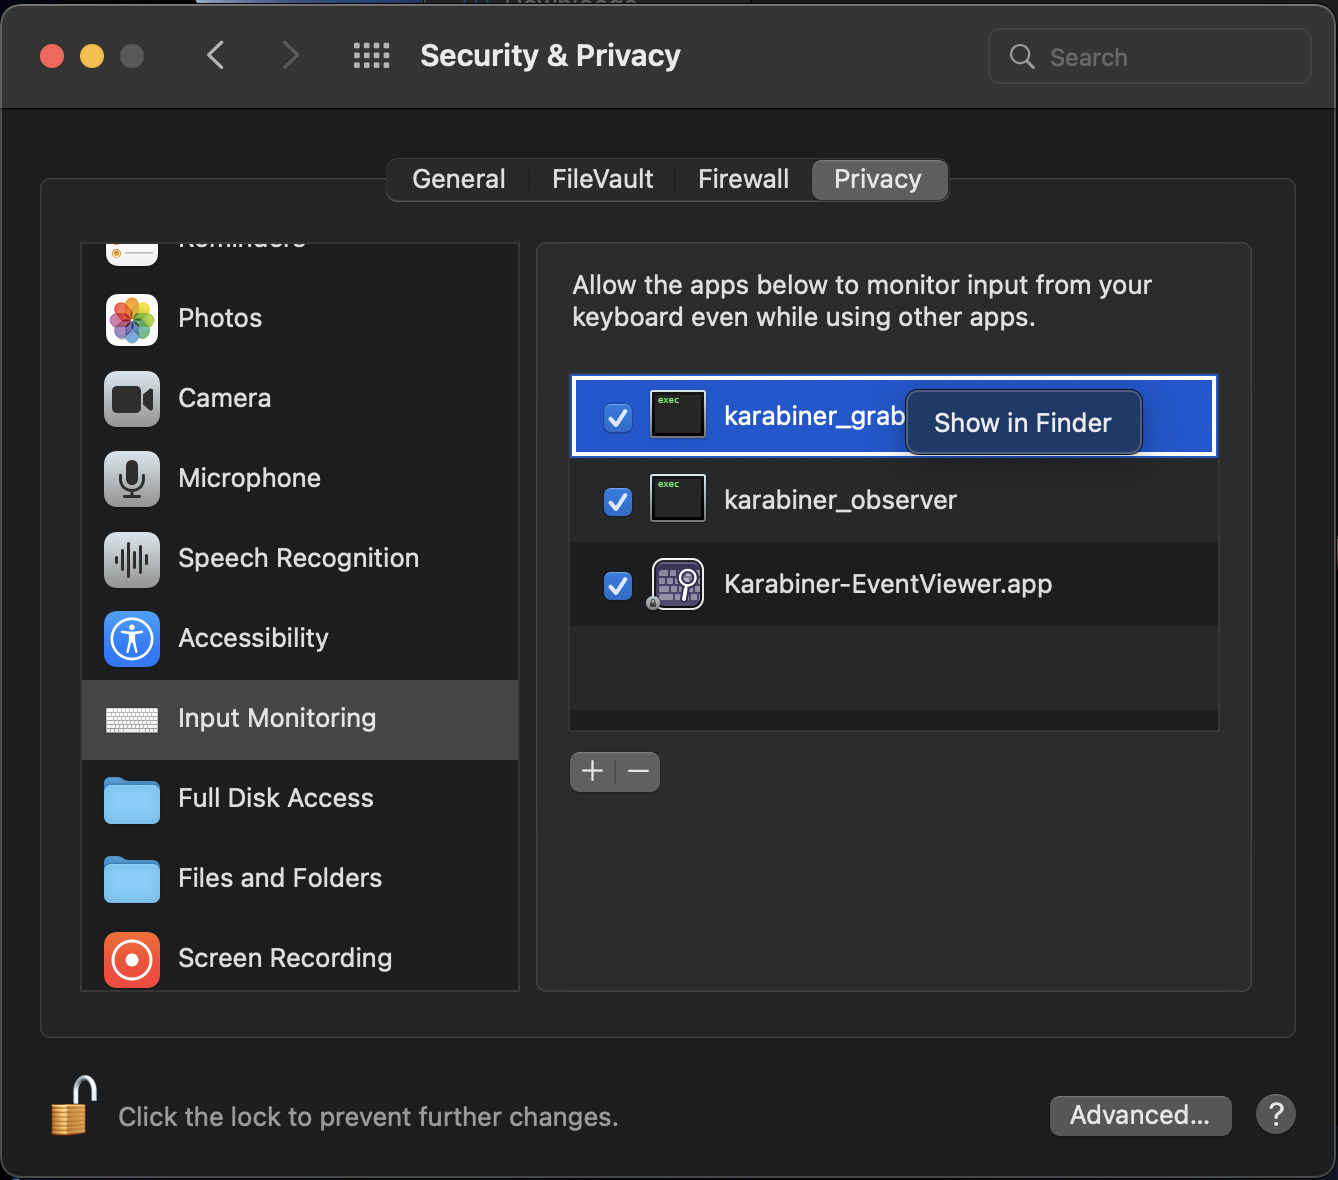
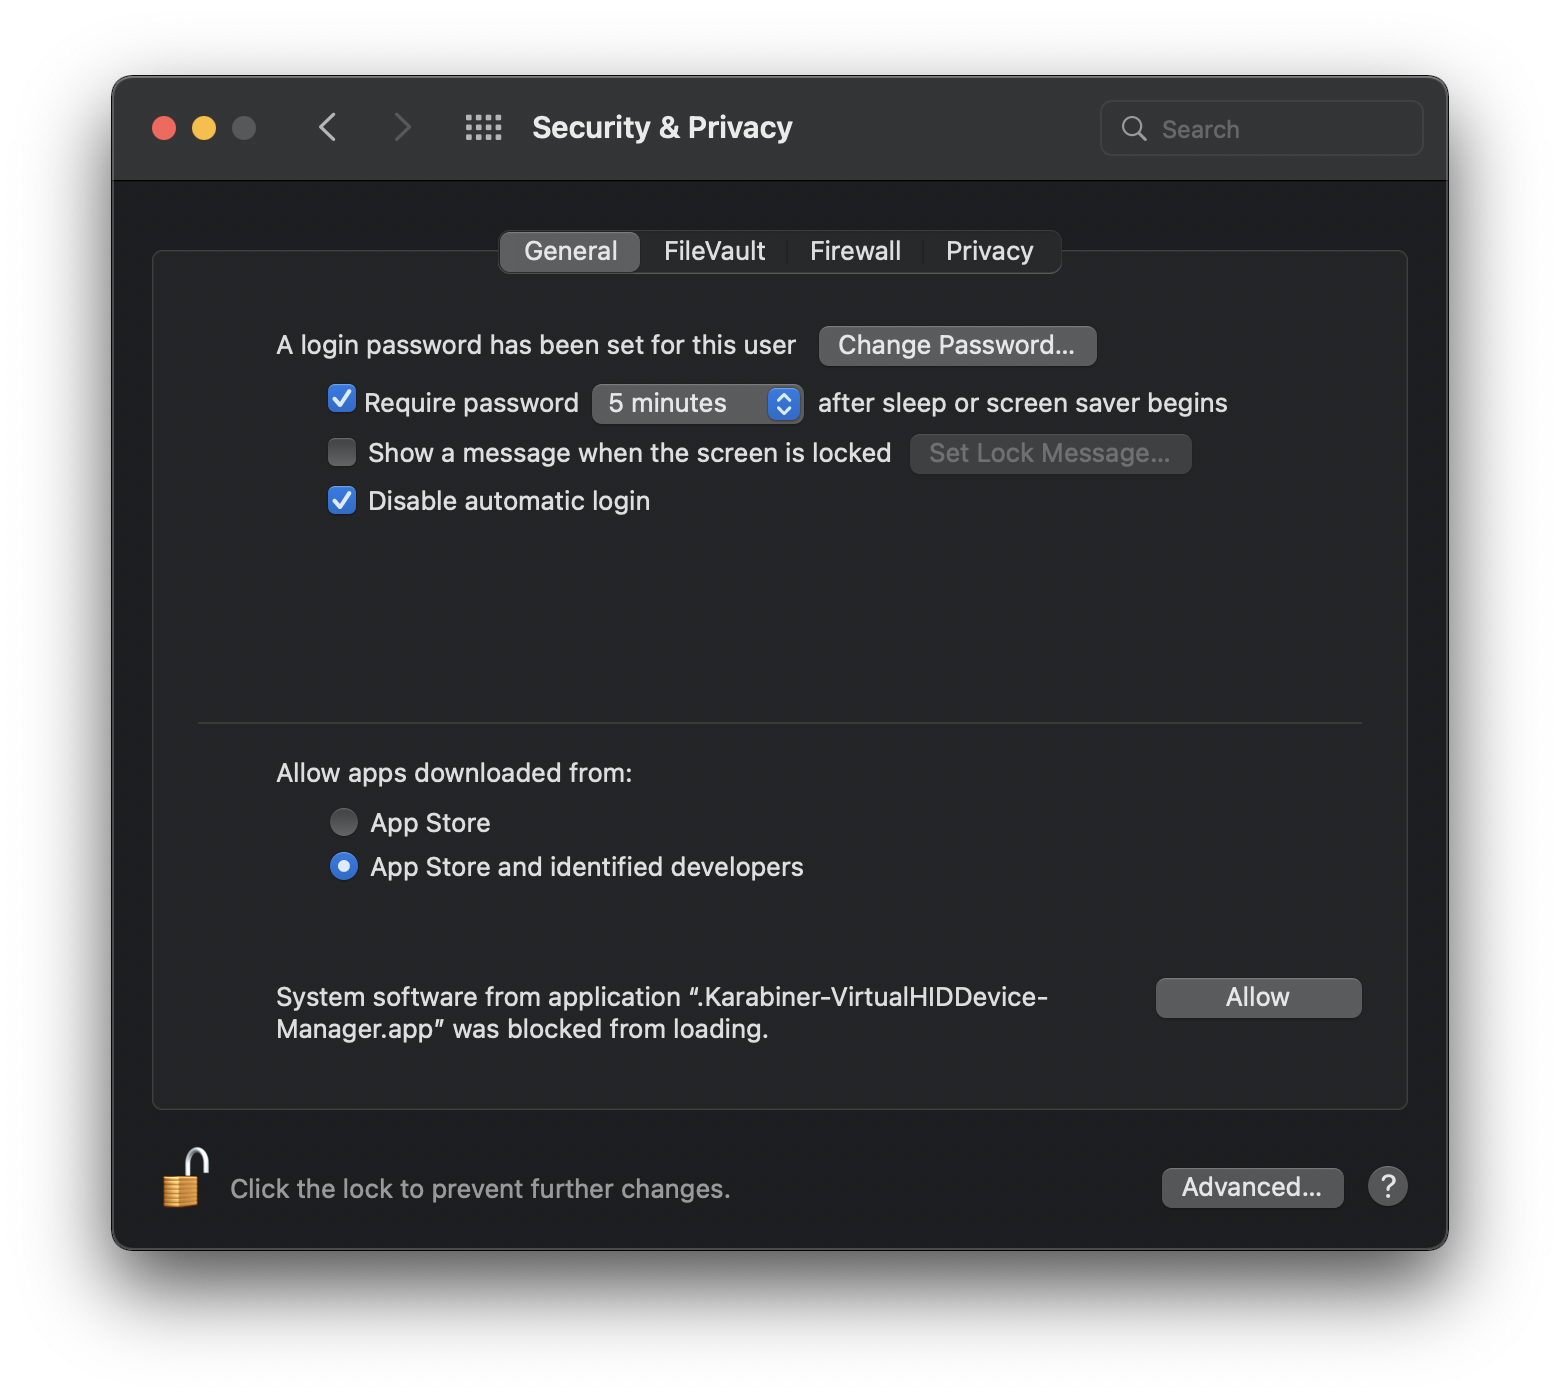
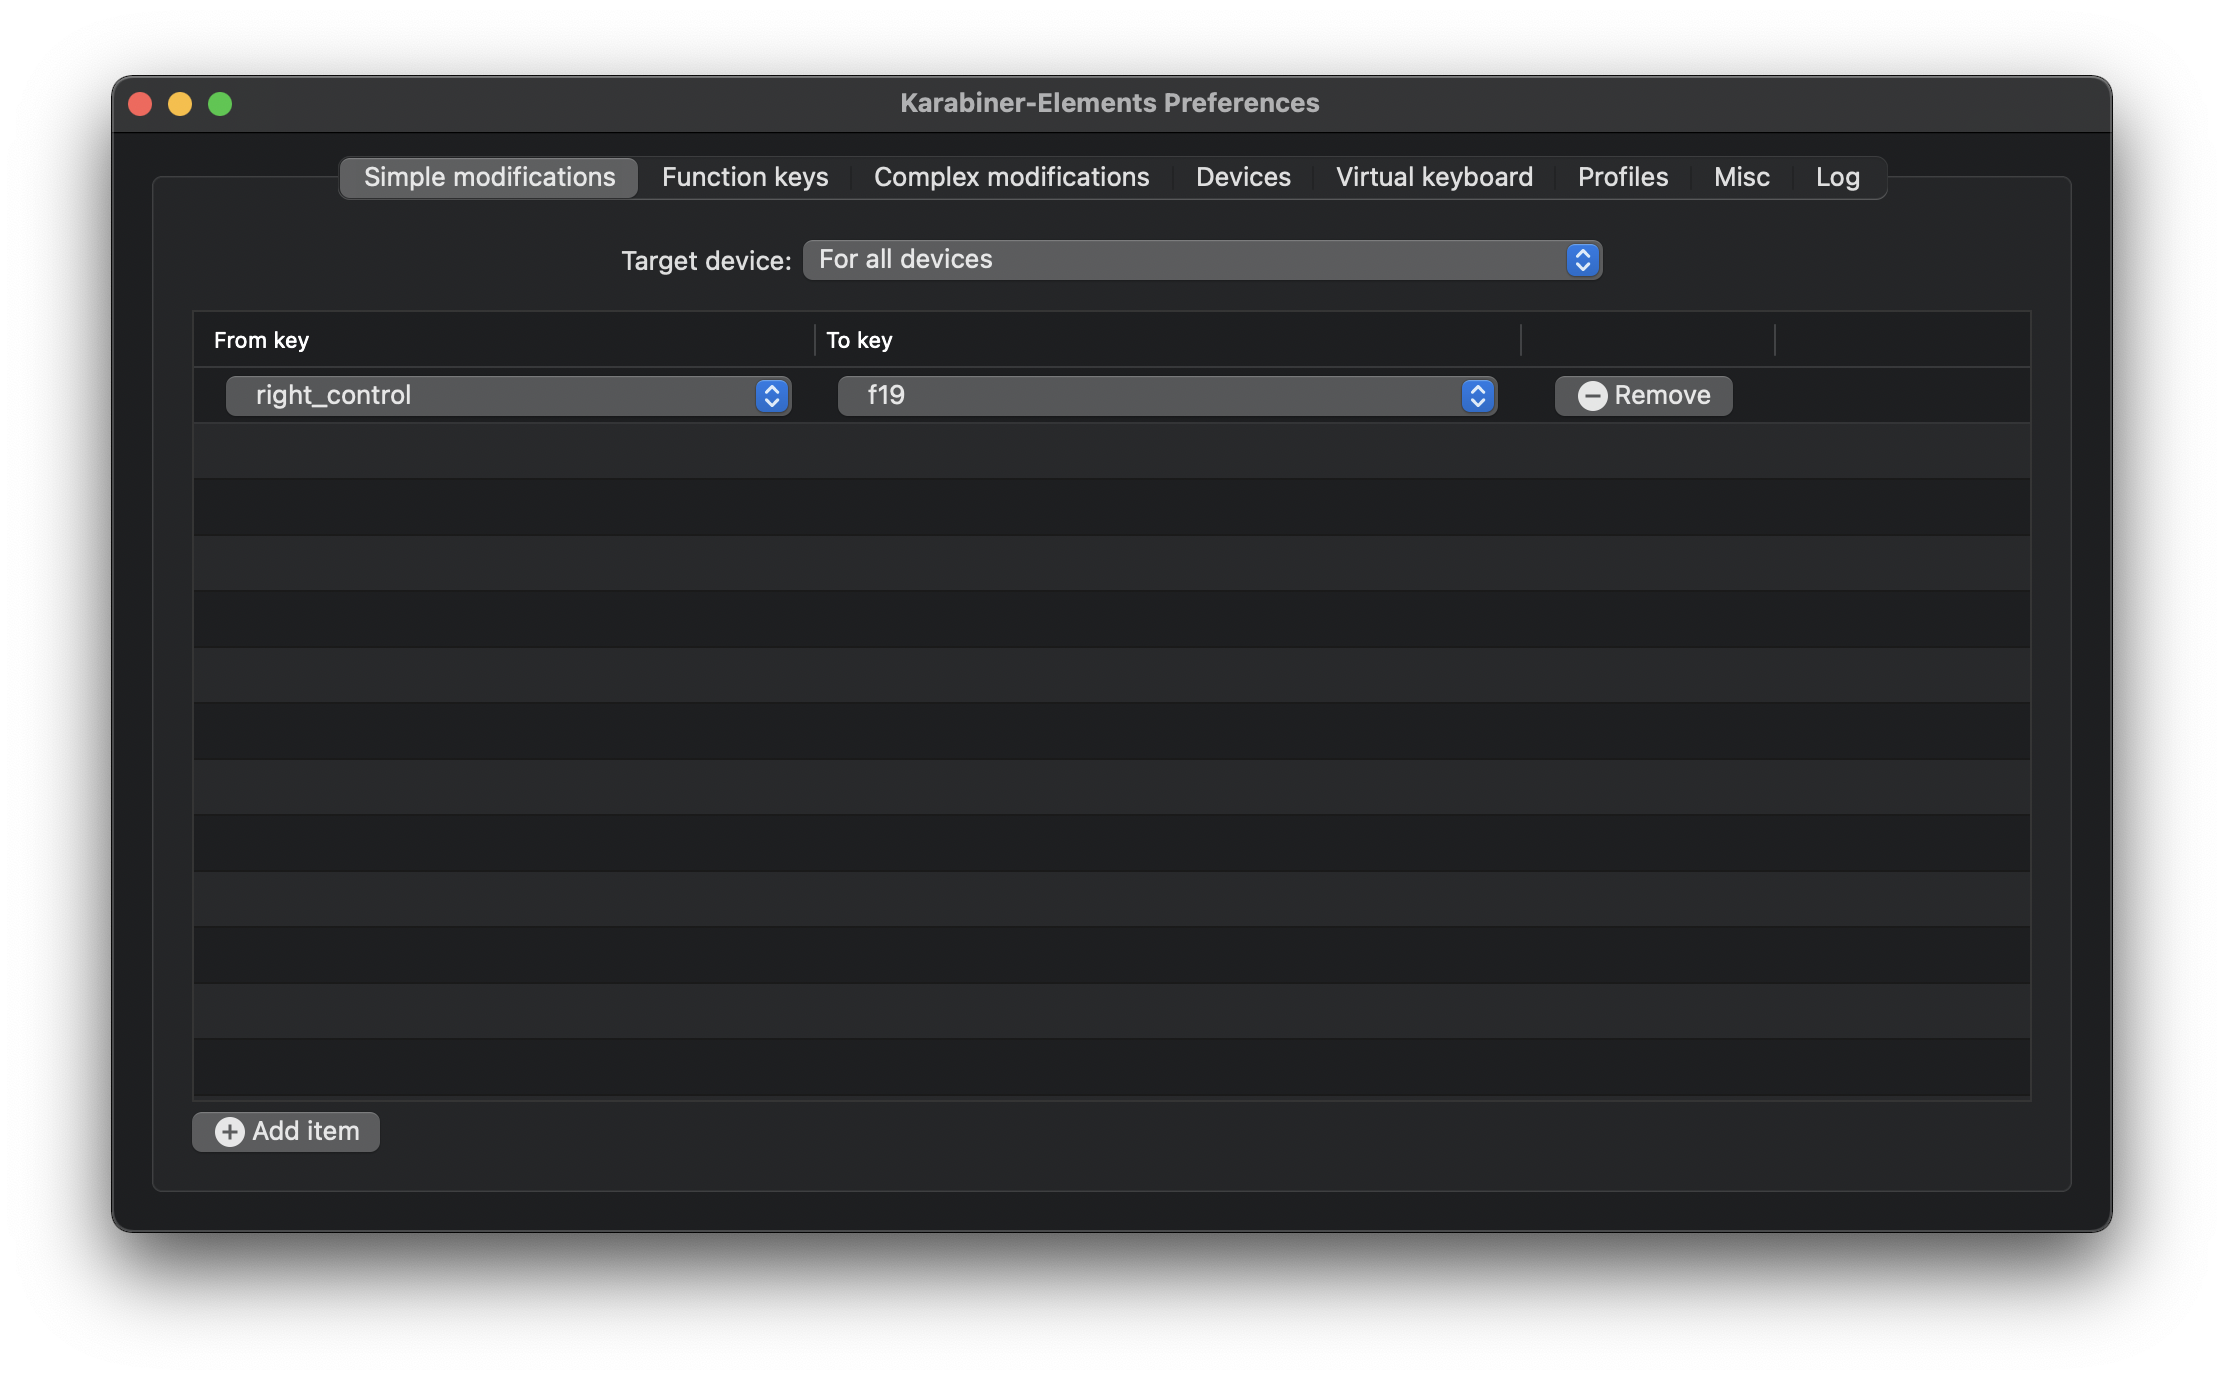
한글 단축키 변경
기본 한/영 전환은 Caps Lock입니다. 불편하지 않으면 그냥 써도 되지만 저는 우측 Cmd 키가 편해서 바꾸기 위해서 키를 바꿉니다.여기를 참고해서 설치하면 됩니다.
Homebrew 설치
/bin/bash -c "$(curl -fsSL https://raw.githubusercontent.com/Homebrew/install/HEAD/install.sh)"
설치 후 아래 명령어도 실행합니다.
echo 'eval "$(/opt/homebrew/bin/brew shellenv)"' >> /Users/snowdeer/.zprofile
eval "$(/opt/homebrew/bin/brew shellenv)"
zsh 및 Oh-My-Zsh 설치
zsh 설치
이제 맥 기본 쉘이 zsh이므로 바로 Oh-My-Zsh 설치로 넘어가면 됩니다.
Oh-My-Zsh 설치
sh -c "$(curl -fsSL https://raw.github.com/robbyrussell/oh-my-zsh/master/tools/install.sh)"
zsh 플러그인 설치
git clone https://github.com/zsh-users/zsh-autosuggestions $ZSH_CUSTOM/plugins/zsh-autosuggestions
git clone https://github.com/zsh-users/zsh-syntax-highlighting.git ${ZSH_CUSTOM:-~/.oh-my-zsh/custom}/plugins/zsh-syntax-highlighting
~/.zshrc 파일 편집
~/.zshrc 파일을 열어서 다음 부분을 찾아서 변경해줍니다.
ZSH_THEME="agnoster"
plugins=(
  git
  zsh-autosuggestions
  zsh-syntax-highlighting
)
그리고 파일 끝 부분에 아래 내용도 추가합니다.
# for (i-search)
stty stop undef

# 프롬프트에서 컴퓨터 이름 삭제
prompt_context() {
  if [[ "$USER" != "$DEFAULT_USER" || -n "$SSH_CLIENT" ]]; then
    prompt_segment black default "%(!.%{%F{yellow}%}.)$USER"
  fi
}
git 설정
git config --global user.name "snowdeer"
git config --global user.email "snowdeer0314@gmail.com"
git config --global core.precomposeunicode true
git config --global core.quotepath false
JDK 설치
여기에서 dmg 파일을 다운받아 설치합니다.
필요한 프로그램 설치
아래는 사파리 툴체인이나 크롬을 이용해서 패스워드를 관리하지만, 기존에 사놓은 제품이 아까워서 설치해줍니다. ㅜㅜ;
아래는 슬프게도 M1 칩을 지원하지 않아서 설치 못하는 어플이네요. ㅜㅜ;
TotalFinder는 가장 유용하게 사용한 어플인데 아쉽습니다. 할 수 없이 위의 Marta 어플로 대체해서 사용하고 있습니다.
그 외 Path Finder로 대체할 수 있을 것 같긴 한데 가격이 좀 비싼 거 같아서 일단은 보류 중입니다.
그 외 brew를 이용해서 다음 프로그램들도 설치합니다.
brew install iproute2mac
brew install tree
App Store에서도 필요한 프로그램들을 설치합니다.
- Xcode
- Unicorn Blocker:Adblock
- Lumafusion
- Dropover Pro