01 May 2019
|
Android
회원 가입
import android.support.v7.app.AppCompatActivity
import android.os.Bundle
import android.widget.Toast
import com.google.firebase.auth.FirebaseAuth
import kotlinx.android.synthetic.main.activity_main.*

class MainActivity : AppCompatActivity() {

    override fun onCreate(savedInstanceState: Bundle?) {
        super.onCreate(savedInstanceState)
        setContentView(R.layout.activity_main)

        create_userid_button.setOnClickListener {
            val email = email_input.text.toString()
            val password = password_input.text.toString()

            registerUser(email, password)
        }
    }

    private fun registerUser(email: String, password: String) {
        FirebaseAuth.getInstance().createUserWithEmailAndPassword(email, password)
            .addOnSuccessListener {
                val userId = FirebaseAuth.getInstance().currentUser
                Toast.makeText(applicationContext, "UserId(${userId?.email}) 생성 성공", Toast.LENGTH_SHORT).show()
            }
            .addOnFailureListener {
                it.printStackTrace()
                Toast.makeText(applicationContext, "UserId 생성 실패(${it.message})", Toast.LENGTH_SHORT).show()
            }
    }
}
로그인
import android.support.v7.app.AppCompatActivity
import android.os.Bundle
import android.widget.Toast
import com.google.firebase.auth.FirebaseAuth
import kotlinx.android.synthetic.main.activity_main.*

class MainActivity : AppCompatActivity() {

    override fun onCreate(savedInstanceState: Bundle?) {
        super.onCreate(savedInstanceState)
        setContentView(R.layout.activity_main)

        login_button.setOnClickListener {
            val email = email_input.text.toString()
            val password = password_input.text.toString()

            login(email, password)
        }
    }

    private fun login(email: String, password: String) {
        FirebaseAuth.getInstance().signInWithEmailAndPassword(email, password)
            .addOnSuccessListener {
                val userId = FirebaseAuth.getInstance().currentUser
                Toast.makeText(applicationContext, "로그인 성공", Toast.LENGTH_SHORT).show()
            }
            .addOnFailureListener {
                it.printStackTrace()
                Toast.makeText(applicationContext, "로그인 실패(${it.message})", Toast.LENGTH_SHORT).show()
            }
    }
}
인증 메일 전송
인증 메일 양식은 Firebase Console에서 수정할 수 있습니다.
하지만 악용될 가능성이 있기 때문에 제목만 수정이 가능하며, 내요을 수정하지는 못합니다.
private fun verifyEmail() {
    val currentUser = FirebaseAuth.getInstance().currentUser
    currentUser?.let {
        it.sendEmailVerification()
            .addOnSuccessListener {
                Toast.makeText(applicationContext, "인증 메일을 전송했습니다.", Toast.LENGTH_SHORT).show()
            }
            .addOnFailureListener {
                it.printStackTrace()
                Toast.makeText(applicationContext, "인증 메일 전송 실패(${it.message})", Toast.LENGTH_SHORT).show()
            }
    }
}
Email 변경 및 패스워드 변경
Email 및 패스워드 변경은 다음 명령어를 이용해서 할 수 있습니다.
- currentUser.updateEmail(newEmail: String)
- currentUser.updatePassword(newPassword: String)
25 Apr 2019
|
Android
build.gradle (프로젝트)
dependencies {
    classpath 'com.android.tools.build:gradle:3.4.0'
    classpath "org.jetbrains.kotlin:kotlin-gradle-plugin:$kotlin_version"
    classpath 'com.google.gms:google-services:4.2.0'
}
build.gradle (모듈)
dependencies {
    implementation fileTree(dir: 'libs', include: ['*.jar'])
    implementation "org.jetbrains.kotlin:kotlin-stdlib-jdk7:$kotlin_version"
    implementation 'com.android.support:appcompat-v7:28.0.0'
    implementation 'com.android.support.constraint:constraint-layout:1.1.3'
    implementation 'com.google.firebase:firebase-auth:16.0.5'
    implementation 'com.google.firebase:firebase-database:16.0.4'

    testImplementation 'junit:junit:4.12'
    androidTestImplementation 'com.android.support.test:runner:1.0.2'
    androidTestImplementation 'com.android.support.test.espresso:espresso-core:3.0.2'
    implementation 'com.google.android.gms:play-services:12.0.1'
    implementation 'com.google.android.gms:play-services-auth:16.0.1'
}
activity_main.xml
<?xml version="1.0" encoding="utf-8"?>
<RelativeLayout
  xmlns:android="http://schemas.android.com/apk/res/android"
  xmlns:tools="http://schemas.android.com/tools"
  android:layout_width="match_parent"
  android:layout_height="match_parent"
  android:orientation="vertical"
  tools:context=".MainActivity">

  <Button
    android:id="@+id/logout_button"
    android:layout_width="wrap_content"
    android:layout_height="wrap_content"
    android:layout_centerInParent="true"
    android:text="logout"/>

</RelativeLayout>
activity_sign_in.xml
<?xml version="1.0" encoding="utf-8"?>
<RelativeLayout
  xmlns:android="http://schemas.android.com/apk/res/android"
  xmlns:tools="http://schemas.android.com/tools"
  android:layout_width="match_parent"
  android:layout_height="match_parent"
  android:orientation="vertical"
  tools:context=".MainActivity">

  <com.google.android.gms.common.SignInButton
    android:id="@+id/sign_in_button"
    android:layout_width="wrap_content"
    android:layout_height="wrap_content"
    android:layout_centerInParent="true"/>

</RelativeLayout>
MainActivity.kt
import android.content.Intent
import android.support.v7.app.AppCompatActivity
import android.os.Bundle
import com.google.android.gms.auth.api.Auth
import com.google.android.gms.common.ConnectionResult
import com.google.android.gms.common.api.GoogleApiClient
import com.google.firebase.auth.FirebaseAuth
import kotlinx.android.synthetic.main.activity_main.*

class MainActivity : AppCompatActivity(), GoogleApiClient.OnConnectionFailedListener {
    override fun onConnectionFailed(p0: ConnectionResult) {
        TODO("not implemented") //To change body of created functions use File | Settings | File Templates.
    }

    lateinit var googleApiClient: GoogleApiClient

    override fun onCreate(savedInstanceState: Bundle?) {
        super.onCreate(savedInstanceState)
        setContentView(R.layout.activity_main)

        googleApiClient = GoogleApiClient.Builder(applicationContext)
                .enableAutoManage(this, this)
                .addApi(Auth.GOOGLE_SIGN_IN_API)
                .build()

        val currentUser = FirebaseAuth.getInstance().currentUser

        if (currentUser == null) {
            val intent = Intent(applicationContext, LoginActivity::class.java)
            startActivity(intent)
        } else {
            // TODO ...
        }

        logout_button.setOnClickListener {
            FirebaseAuth.getInstance().signOut()
            Auth.GoogleSignInApi.signOut(googleApiClient)

            val intent = Intent(applicationContext, LoginActivity::class.java)
            startActivity(intent)
        }
    }

    override fun onResume() {
        super.onResume()

        val currentUser = FirebaseAuth.getInstance().currentUser
        supportActionBar?.title = currentUser.toString()

    }
}
LoginActivity.kt
import android.content.Intent
import android.support.v7.app.AppCompatActivity
import android.os.Bundle
import android.widget.Toast
import com.google.android.gms.auth.api.Auth
import com.google.android.gms.auth.api.signin.GoogleSignIn
import com.google.android.gms.auth.api.signin.GoogleSignInOptions
import com.google.android.gms.common.ConnectionResult
import com.google.android.gms.common.api.GoogleApiClient
import com.google.firebase.auth.FirebaseAuth
import com.google.firebase.auth.GoogleAuthProvider
import kotlinx.android.synthetic.main.activity_login.*

class LoginActivity : AppCompatActivity(), GoogleApiClient.OnConnectionFailedListener {

    private val REQUEST_CODE_SIGN_IN = 1001

    override fun onCreate(savedInstanceState: Bundle?) {
        super.onCreate(savedInstanceState)
        setContentView(R.layout.activity_login)

        val gso = GoogleSignInOptions.Builder(GoogleSignInOptions.DEFAULT_SIGN_IN)
                .requestIdToken(getString(R.string.default_web_client_id))
                .requestEmail()
                .build()

        val googleSignInClient = GoogleSignIn.getClient(this, gso)

        login_button.setOnClickListener {
            val intent = googleSignInClient.signInIntent
            startActivityForResult(intent, REQUEST_CODE_SIGN_IN)
        }
    }

    override fun onConnectionFailed(result: ConnectionResult) {
        Toast.makeText(applicationContext, "연결 실패", Toast.LENGTH_SHORT).show()
    }

    override fun onActivityResult(requestCode: Int, resultCode: Int, data: Intent?) {
        if (requestCode == REQUEST_CODE_SIGN_IN) {
            val result = Auth.GoogleSignInApi.getSignInResultFromIntent(data)
            if (result.isSuccess) {
                val account = result.signInAccount
                val credential = GoogleAuthProvider.getCredential(account?.idToken, null)
                FirebaseAuth.getInstance().signInWithCredential(credential)
                        .addOnSuccessListener {
                            Toast.makeText(applicationContext, "인증 성공", Toast.LENGTH_SHORT).show()
                            startActivity(Intent(applicationContext, MainActivity::class.java))
                            finish()
                        }
                        .addOnFailureListener {
                            Toast.makeText(applicationContext, "인증 실패(${it.message})", Toast.LENGTH_SHORT).show()
                        }
            } else {
                Toast.makeText(applicationContext, "로그인 실패", Toast.LENGTH_SHORT).show()
            }
        }
    }
}
24 Apr 2019
|
Android
Firebase 계정 설정
Firebase Application을 작성하기 위해서는 먼저 Firebase 계정이 필요합니다.
먼저 Firebase Console에 로그인합니다.
그리고 신규 프로젝트 추가를 실행합니다.
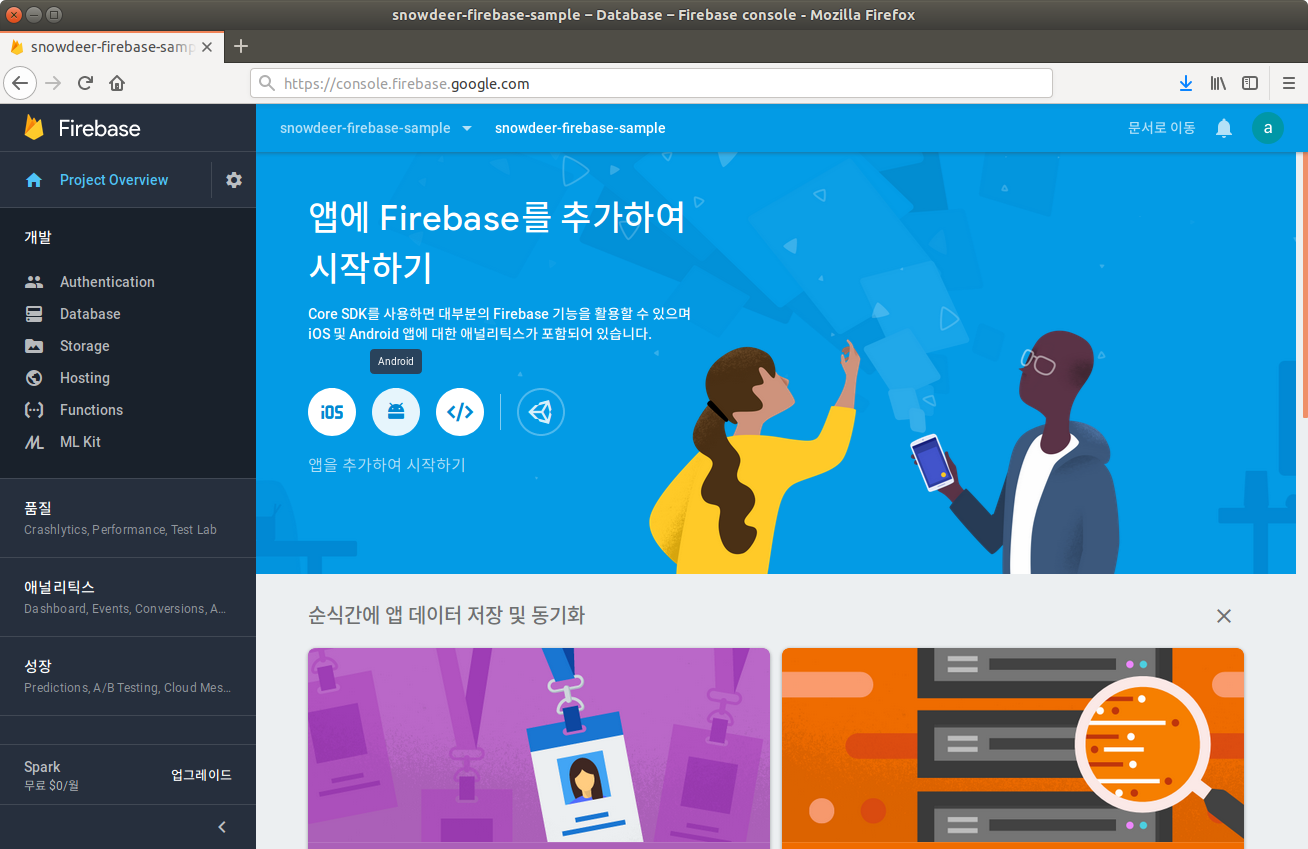
그리고 화면에서 Android 버튼을 눌러서 안드로이드 앱을 추가합니다.
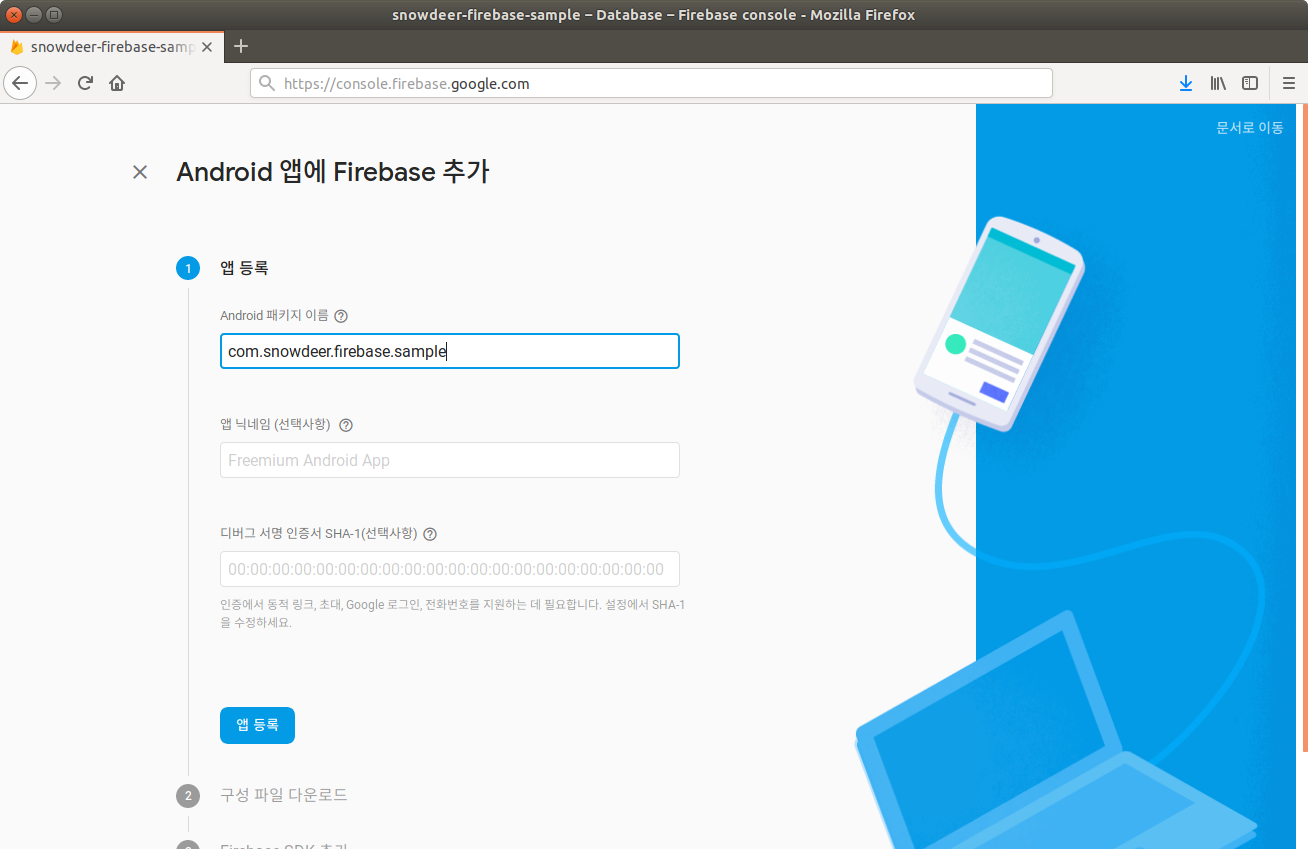
앱 등록 화면에서는 패키지 이름을 넣도록 합시다.
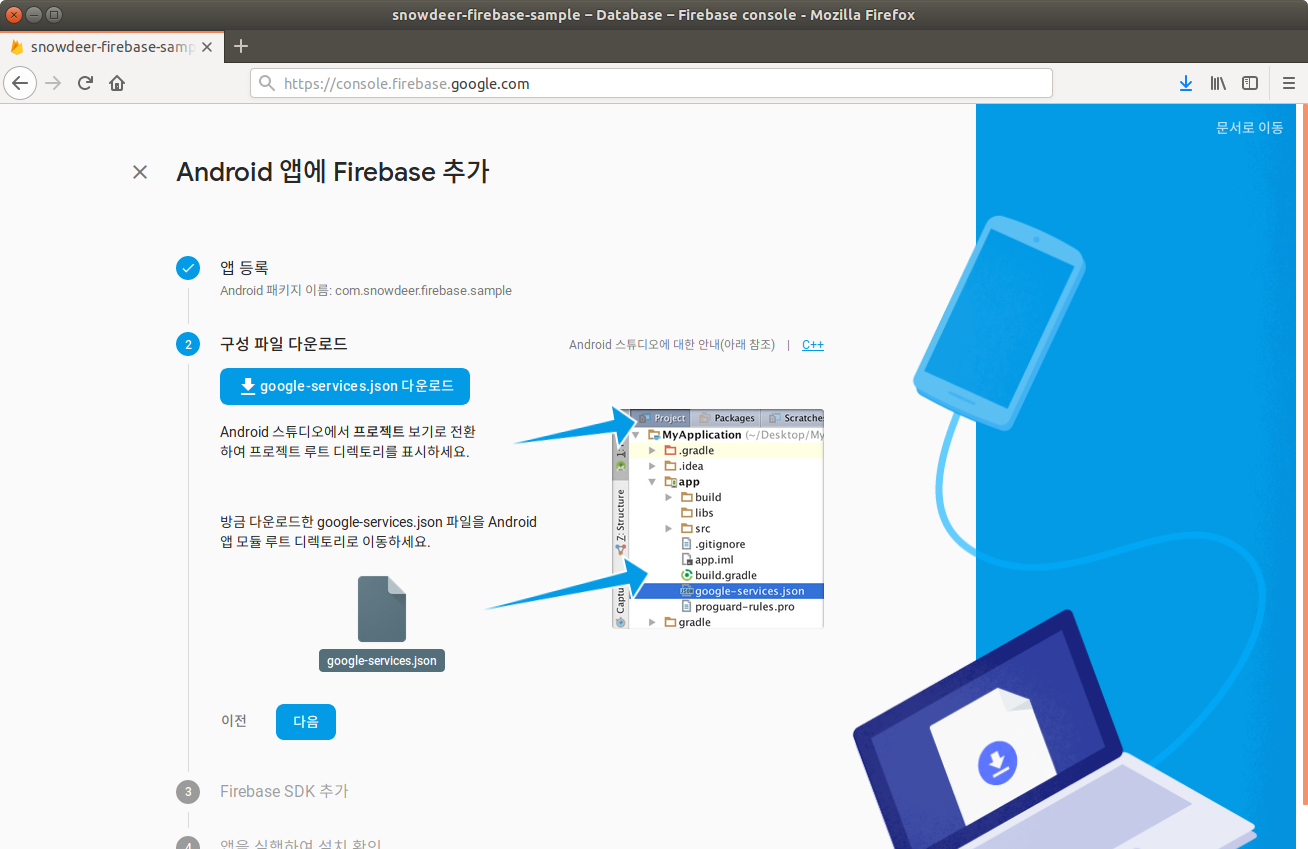
구성 파일 다운로드 화면이 나오는데, google-services.json 파일을 다운로드 해서 모듈의 루트 디렉토리에 복사해줍니다.
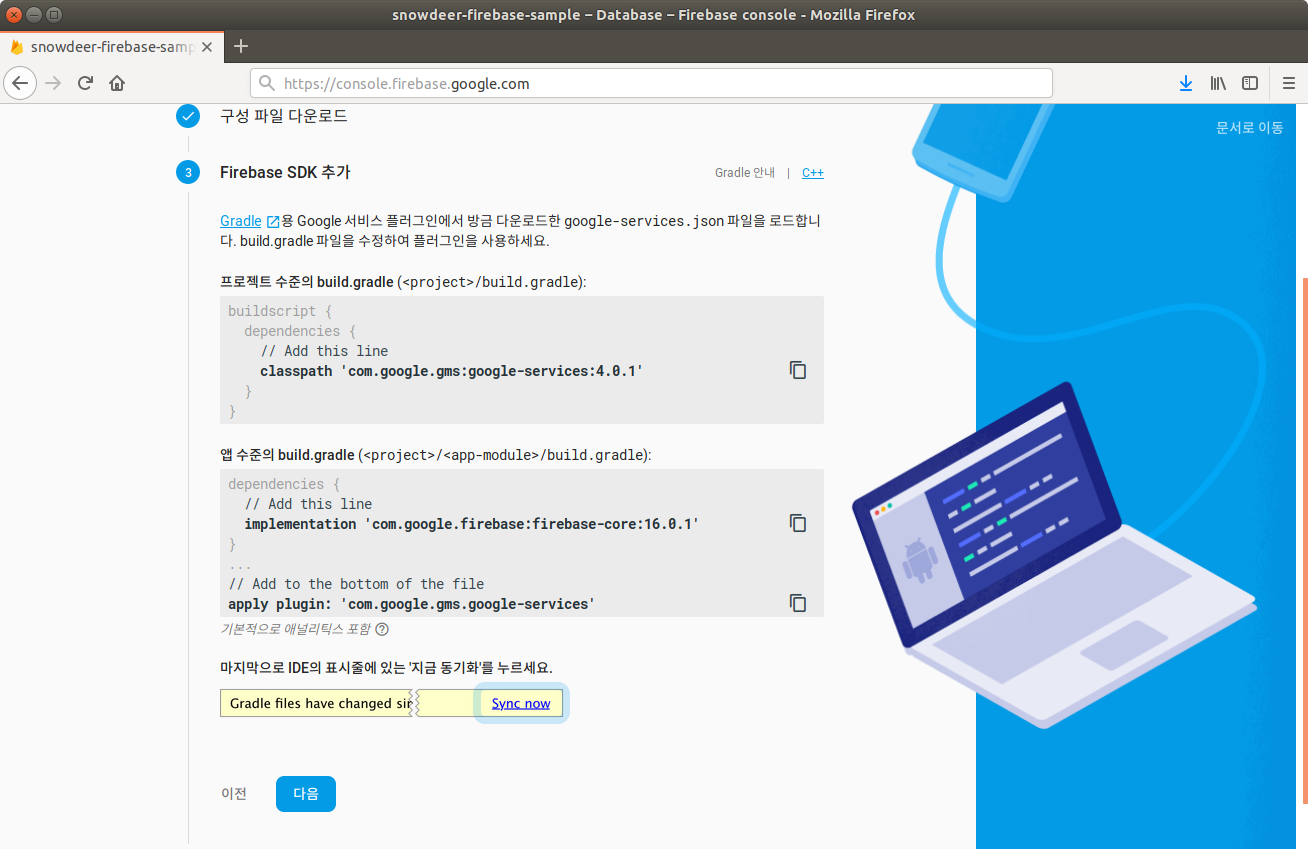
그리고 프로젝트의 build.gradle 파일과 모듈의 build.gradle 파일에 다음과 같은 플러그인을 설정해줍니다.
build.gradle (프로젝트)
buildscript {
  dependencies {
    // Add this line
    classpath 'com.google.gms:google-services:4.0.1'
  }
}
build.gradle (모듈)
build.gradle (프로젝트)
dependencies {
  // Add this line
  implementation 'com.google.firebase:firebase-core:16.0.1'
}

...

// Add to the bottom of the file
apply plugin: 'com.google.gms.google-services'
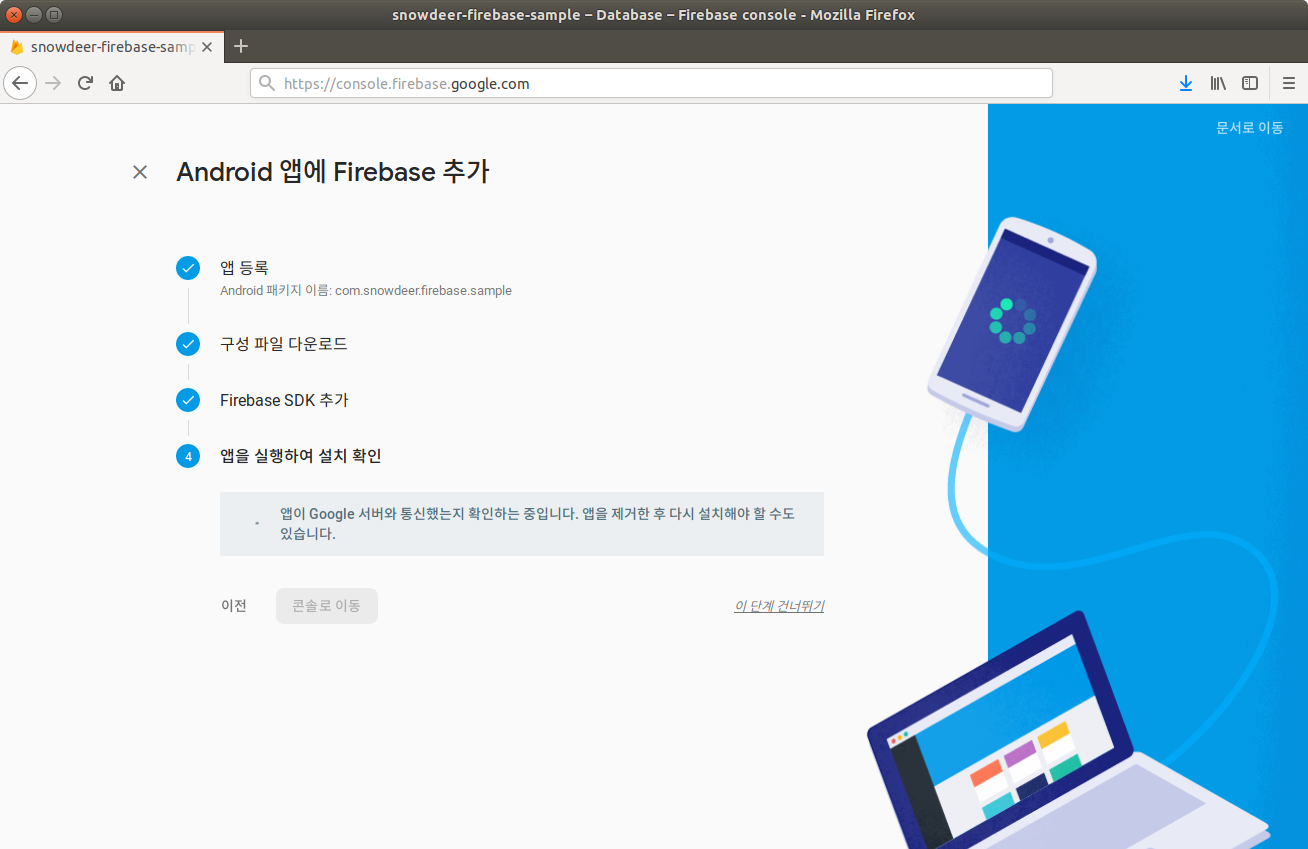
위 단계까지 설정하고 나서 단말에서 어플리케이션을 실행해주면 Firebase 서버에서 어플리케이션 설정이 정상적으로 되었는지 체크합니다.
위 과정을 거치면 본격적으로 Firebase 어플리케이션을 작성할 수 있습니다.
23 Apr 2019
|
Android
Kotlin
TodoInfo.kt
import android.os.Parcel
import android.os.Parcelable
import io.realm.RealmObject
import io.realm.annotations.PrimaryKey

open class TodoInfo(
        @PrimaryKey
        var id: Long = 0,
        var categoryId: Long = 0,
        var text: String = "",
        var date: Long = 0,
        var done: Boolean = false,
        var seq: Long = 0,
        var isNotification: Boolean = false
) : RealmObject(), Model, Parcelable {
    constructor(categoryId: Long, text: String) : this(0, categoryId, text, 0, false, 0, false)

    private constructor(p: Parcel) : this(
            p.readLong(), p.readLong(), p.readString(), p.readLong(),
            p.readInt() == 1, p.readLong(), p.readInt() == 1
    )

    override fun writeToParcel(dest: Parcel?, flags: Int) {
        dest?.writeLong(id)
        dest?.writeLong(categoryId)
        dest?.writeString(text)
        dest?.writeLong(date)
        dest?.writeInt(if (done) 1 else 0)
        dest?.writeLong(seq)
        dest?.writeInt(if (isNotification) 1 else 0)
    }

    override fun describeContents(): Int {
        return 0
    }

    companion object CREATOR : Parcelable.Creator<TodoInfo> {
        override fun createFromParcel(parcel: Parcel): TodoInfo {
            return TodoInfo(parcel)
        }

        override fun newArray(size: Int): Array<TodoInfo?> {
            return arrayOfNulls(size)
        }
    }
}
활용 예제(Fragment의 newInstance 메소드 매개변수로 Parcelable 전달하기)
class SampleFragment() : DialogFragment() {

    private lateinit var todoInfo : TodoInfo

    companion object {
        private const val ARG_TODO_INFO = "ARG_TODO_INFO"

        fun newInstance(todoInfo: TodoInfo): SampleFragment {
            return SampleFragment().apply {
                arguments = Bundle().apply {
                    putParcelable(ARG_TODO_INFO, todoInfo)
                }
            }
        }
    }

    override fun onCreate(savedInstanceState: Bundle?) {
        super.onCreate(savedInstanceState)
        arguments?.let {
            todoInfo = it.getParcelable(ARG_TODO_INFO)
        }
    }
}
22 Apr 2019
|
Android
Kotlin
TimeUtil.kt
import java.lang.Exception
import java.text.SimpleDateFormat
import java.util.*

class TimeUtil {
    companion object {

        @Synchronized
        fun getTimeAsLong(): Long {
            val calendar = Calendar.getInstance()
            return calendar.timeInMillis
        }

        @Synchronized
        fun getTimeAsString(format: String): String {
            val date = Date(getTimeAsLong())
            val sdf = SimpleDateFormat(format, Locale.getDefault())

            return sdf.format(date)
        }

        @Synchronized
        fun getTimeAsLong(format: String, text: String): Long {
            try {
                val sdf = SimpleDateFormat(format, Locale.getDefault())
                val date = sdf.parse(text)

                return date.time

            } catch (e: Exception) {
                e.printStackTrace()
            }

            return -1
        }

        @Synchronized
        fun getTimeAsString(format: String, time: Long): String {
            val date = Date(time)
            val sdf = SimpleDateFormat(format, Locale.getDefault())

            return sdf.format(date)
        }
    }
}
Log.kt
class Log {
    companion object {
        private const val TAG = "SampleApp"
        private const val PREFIX = "snowdeer"

        @Synchronized
        fun v(text: String) {
            android.util.Log.v(TAG, getDecoratedLog(text))
        }

        @Synchronized
        fun d(text: String) {
            android.util.Log.d(TAG, getDecoratedLog(text))
        }

        @Synchronized
        fun i(text: String) {
            android.util.Log.i(TAG, getDecoratedLog(text))
        }

        @Synchronized
        fun w(text: String) {
            android.util.Log.w(TAG, getDecoratedLog(text))
        }

        @Synchronized
        fun e(text: String) {
            android.util.Log.e(TAG, getDecoratedLog(text))
        }

        private fun getDecoratedLog(text: String): String {
            val sb = StringBuilder()

            sb.append("[$PREFIX] ")
            sb.append("[${TimeUtil.getTimeAsLong()}] ")
            sb.append(text)

            return sb.toString()
        }
    }
}